Dead Trigger 2: Best First-person shooter Android Game

Dead trigger 2 is an awesome first-person shooter game that was released in 2013 and fully launched 2014.
It's also a multi-platform game by Madfinger Games. It's also a single player zombie-themed shooter and the continuation of the previous version (Dead trigger).

Dead Trigger2 logo


The story of the game is all about fighting zombies monsters in various cities.


The version of the game that you would be downloading from the links I would drop below is a modded verion of the game with cheats loaded in it, that can enable you full your health, increase your cash and also your ammo and grenades.

Dead Trigger2 logo


How to install dead trigger on your Android phone or tablet

Step 1: First download the apk and data from the below links..

For Mali type GPU/CPU download apk file here and it's data (obb) here


For PowerVR CPU/GPU type, dowload the apk file here and it's data (obb) here


For Tegra CPU/GPU type, download the apk file here and the data (obb) here


For Adreno CPU/GPU type, download apk file here and it's data (obb) here


Step 2: Then on your android phone, move to settings/security/unknown Sources, then make sure the box is checked.


Finally: You can now download and install the game successfully.


Happy gaming.. Enjoy!!!
I'd advice you to join our daily email readers to get updated. To join simply Click Here, and also Like our fb page here to get updated.

Best Way to Root Nexus 5 and Nexus 7 on Android L Preview

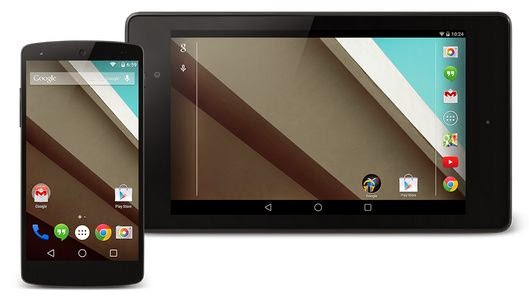
Lately, Google introduced the inventor preview of the latest Android OS which is Android L. For the meantime, the preview is only compatible for Nexus 5 and Nexus 7 users. That is, they can easily upgrade to the Android L Operating System.

Today's stroll, I would brief you on the best ways to root Nexus 5 and Nexus 7 on Android L Preview, and all credits goes to the senoir XDA Developer Chainfire who unvieled the New script for rooting Nexus 5 and Nexus 7 on Android L preview.

Nexus7 logo


Procedures:

1. First Download the Nexus drivers and then install on your PC

2. Then Unlock the bootloader of your nexus device, be it Nexus 5 or Nexus 7. You can check for the Nexus bootloader Unlock Guide here.

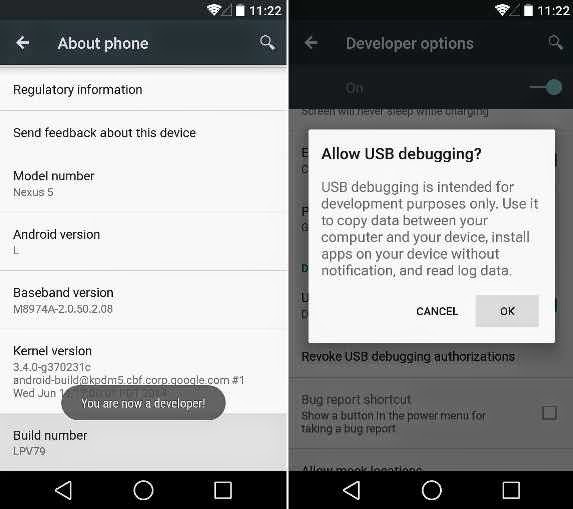
3. Once the above process is proceeded, then enable USB Debugging. To enable, simply Go to settings >> About Phone, then scroll down and then click on Build Number 7 times, then you would recieve an alert on the screen, which is, ''You are Now a Developer'', then you are to move to the developer option and tick out the box which is next to USB Debugging, then tap Ok.

Nexus7 rooting logo


Read also: - How to install Kitkat Google Launcher

- How to Root Tecno R7 Smartphone without the use of PC


4. Then Download ADB files on your PC. They have that for Window Users, Mac users and also that for Linux users. Then extract the file to your desktop screen.

5. After the above steps, you're to download recovery for your nexus device, either the TWRP or the Clockworkrom recovery, then select your nexus device type and download the recovery tools on your computer. Don't forget to rename the recovery file you downloaded to recovery.img

6. That ABD folder that you downloaded, as mentioned in step 4, move the renamed recovery.img to the folder.

7. Then switch off your nexus device and then boot in fastboot mode. When booting in fastboot mode on Nexus 7, simply press on volume down + power button, then for Nexus 5, you've to press the volume up + volume down + power button simutaneously, then you would automatically be directed to bootloader mode.

8. Then connect your Nexus device to your computer through the use of USB cable

Read also: -How to Easily Flash the Custom Rom of your Android Device

- How to Root Any Android Device without the Use of a computer


9. Then open the ADB folder that you moved on your desktop, then hold shift key and then make a right click on your keyboard, then click and choose ''open command window here''.

10. Then a command prompt window would appear. Simply input the below command:

fastboot flash recovery recovery.img


11. With the above step, it would help restore the recovery of your nexus device. Then make use of the volume button to select ''restart bootloader'' option, followed by pressing Power button.

Immediately you're done with that, the recovery would be successfully installed on your device. Now your device is ready for rooting.


12. Then Download Super SU v2.00 which is patched for Android L, and also download the boot file which helps to fix the binary issue. Download boot file for Nexus 5 or that for Nexus 7.

13. Then Copy and paste the downloaded boot file and SuperSU to a safe location of your device.

5 Must-Have Free Android Apps for Business

The Android smartphones is of great use in the business world and organization. Most times, you don't have to take your laptops and PC's to your workshop when a mini computer that is very well intergrated with awesome functionalities is just inside your pocket.

Android business app logo


The truth is that, 90% of most business activity that is proceeded with a computer can also be completed with the use of your android phone or tablet, so why don't you save the stress of performing multiple task on your PC when your android device is just right beside you.


Today's stroll, I would highlight the 5 Must-Have Free Android Apps for Business.


#5. Free Notepad: (Download Here)

Notepad is a very useful business app for android smartphone. I've so much loved to use Notepad on my android device whenever am preparing any minor tutorial or article, this has actually helped me alot. Most times, I'd travel out, leaving my personal computer behind for over months because I've my Notepad in my android smartphone that helps me perform my task with ease. So if you're a creative person in terms of drawing and painting, the notepad is also recommended for you.


Below are some highlighted features of Notepad:

- Presence of search notes and drawing
- It automatically saves your notes and images into the Notepad folder
- It can also be used in painting and drawing
- It can also Edit the name of pictures and notes
- other pro-paint acheves also included and many more

Read aslo: 10 Best Android Apps for Football Lovers


#4. Cloud Print Plus: (Download Here)

This is a better version of the cloud print with lots of advanced features. Actually, the key function of this app, is to help print your file from your android phone or tablet.


Key Features:

- This app serves as printer manager
- It also enables your device to share printers with your colleagues
- It also helps in sms, drawing, mail, webpage and contacts printing.
- Printing can also be done from facebook, google drive, dropbox etc.


#3 Evernote: (Download Here)

Evernote is a very usefull and the most top-rated android business app that helps you remember all activities across your android device.
It can also be used to jot business notes, create to-do list, capture photos and the jotted note is easily found whether at home, at work or anywhere.

How to Fix Google Play store common errors

Good day readers. For quite a long time now, I created a thread where all android problems are being resolved. And strolling through most people comments, I noticed that quite a lot of android users are familiar with the goolgle play store errors which disturbs them from almost all google play activities.

I had to compile the common errors and their solutions, though credits goes to testmasterbd, androidpit, androidcentral forum and some other guides over the internet.


Today's stroll, I would issue you guys the solutions to all the common Google playstore errors. So, just keep calm and select from the below, the errors that have been disturbing your google play store and make use of their solutions to get such problem resolved.

Common Google Play Errors and their Solutions:

Error 491:

Problem:
Impossible to download and update.
Google play error logo
Solution:
Remove your google account. To remove, on your device go to the settings => accounts => Google. Hit remove account. Then reboot your android and then add the account once again. Next, go to the settings, go to apps (applications) and then swipe to find ‘all’ of your apps. Remember to scroll down to google services, then press clear data and finally force stop.

Error 498:
Problem:
Interrups Downloads from the Google play store
Solution:
Full cache in your device is what cause such problem. Delete some unwanted applications and files. Then restart your android device in recovery mode by pressing the volume down, power and home buttons (for most samsung devices) or volume down and power (for most other devices). This mode also provides a few more options. Select wipe cache partition, that is, by navigating between options with the volume rocker. Then confirm using the power button.

Read also: 3 Ways to Download Android Paid Apps for free

Error 919:
Problem:
After successful Download of any App, that App fails to function
Solution:
This occurs due to lack of space in your android device. Simply eliminate all unwanted data like Musics, videos or any large applications.

Error 413:
Problem:
Impossible to download and update. Even use of proxy can be a problem to such error.
Solution:
Go to the settings, go to apps (applications) and then swipe to find ‘all’ of your apps. Remember to scroll down to google services, then press clear data and finally force stop. Follow same procedure and go to your google play store to wipe all cache from the internet.

Read also: 5 Ways to Reduce High data Usage on Androids

Error 923
Problem
Impossible to download: Error while syncing your google account or maybe insufficient cache memory.
Solution
Remove your google account. To remove, on your device go to the settings => accounts => Google. Hit remove account. Then reboot your android and then add the account once again. Then restart your android device in recovery mode by pressing the volume down, power and home buttons (for most samsung devices) or volume down and power (for most other devices). This mode also provides a few more options. Select wipe cache partition, that is, by navigating between options with the volume rocker. Then confirm using the power button. Don’t bother, your personal data won’t be removed.

Error 921
Problem
Apps can't be downloaded.
Solution
Delete the cache of the google play store app. If this doesn’t work, then delete all the play store app data, but please be note that this will instantly delete all the settings that you’ve already made. Then remove your google account and restart the device and add it again.

Recommended: How to install CWM Recovery Image on All Tecno Phones

Error 403
Problem
Not possible to download Apps. This normally happens when you use two or more google accounts to buy applications on that particular device.
Solution
First Go the google play store with your active google credentials. Then uninstall the application in question. After that, try to get the app from google play again and click the purchase the button.

Error 492
Problem
Impossible for App installation due to dalvik cache.
Solution
Go to the settings, go to apps (applications) and then swipe to find ‘all’ of your apps. Remember to scroll down to google services, then press clear data and finally force stop. Same thing should be conducted on the Google play store.
NB: If eventually the problem is not solved, then try deleting the dalvik cache. To delete it, Simply enter the custom recovery mode (that is if only you have root). Another solution is to complete a factory reset/ data wipe. This option is applicable to all users and can be done through recovery mode. Take note, all data would be lost, so try to make sure you've backed up vital data.

Error 927
Problem
Impossible to download data, due to update of the Google play is in progress
Solution
Simply keep calm for some minutes until the google play store is completely updated. If the problem persists, Go to the settings, go to apps (applications) and then swipe to find ‘all’ of your apps. Remember to scroll down to google services, then press clear data and finally force stop. Same thing should be conducted on the Google play store.

Most Read: How to install Cyanogenmod on non-rooted Android phones

Error 101
Problem
Nothing can be downloaded, due to lack of storage space
Solution
Simply uninstall all unwanted or useless apps or you can clear play store data and remove google account then re-login in

Error 481
Problem
Occured Error in Google play account
Solution
Simply remove the Google play store and fix another.

Error 911:
This error normally comes as, application not able to download due to error 911
Solution:
Tips 1: Try to clear the google play store data
Tips 2: It would require a webpage login, if you're using a wifi, that is, your authentication has probably expired. Try to Log in to the apn again using your android browser then open google play store and run the application update again . If that didn’t work the problem is probaly from the wifi network itself.
Tips 3: Just switch to another wifi network and run updates. Then the error 911 would disappear for the new wifi network.
Tips 4: Try using you mobile betwork service instead of wifi and now open your google play store, then download/update your apps. However, this method is only compatible for apps and games that are of low quality. For larger quality app updates you should try using your wifi network to save data charges.

Read also: How to flash Androids Custom Rom Easily

Error 919:
Impossible to install any application
Solution: Simply change your network access point settings

How to Verify your Blackberry ID

Good day readers. Not quite long we heard about the avaliablity of the BBM v2.2 for Androids and iOS devices. Today's stroll, I would brief you guys on how to Verify your Blackberry ID.


Verification of Blackberry ID is very important because there are some scenario where by we lost our password, then reseting it won't be easy because unverification of Blackberry ID email address.

Blackberry logo

In other to avoid such scenario, simply follow the below procedure to verify your blackberry email address and be on a saver path.


Read also: How to record improtant calls From Your BB10 Smartphone


How to Verify your Blackberry ID Email address

Comfirming through your web browser

1. First, Go to http://bbid.com

2. Then Sign in with your blackberry details.

3. After which you're to Select Account Details and underneath Email Status, then click Confirm your BlackBerry ID email address


4. Go to your email inbox and search for message from donotreply@blackberry.com with the subject that states, Confirm your BlackBerry ID email address


5. Then, click Confirm your email address


6. Finally, Enter your BlackBerry ID password, then click Submit.

Read also: How to download Blackberry Paid Apps For free


Using Androids and iPhones to Verify Email address


1. On your BBM, simply tap More. It's located in the bottom at right corner.

2. Then Tap Settings and under settings, you're to tap BBID


3. After the above procedure, Enter the BlackBerry ID password then select Sign In


4. At the side of the Email Status field, simply tap Confirm my email


5. In the BlackBerry ID email that you receive, simply click Confirm your email address


6. Finally, enter your BlackBerry ID password and then select Submit.


There are some cases where by you would want to update your previous email address with the new one. However the below procedure would be of help.

Must read: Best Tips for Unlocking Blackberry Phones