
Android L Operating system is really an impressive one. The Android L OS comes with great features like the changes made in the notifications and lock screen, interlocking of apps, faster, cool look and even more efficient. And another good thing about this latest operating system (Android L) is that battery of any smartphone running Android L becomes much more efficient. Actually, the Android L operating system is already made avaliable for the Nexus 5 and Nexus 7 Smartphones, and I also made a post previously, on how to root a Nexus 5 or Nexus 7 Smartphone under Android L Preview.
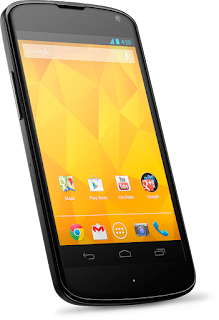
Today's stroll, I would brief you on the best way to install Android L on Nexus 4 Smartphones.
Source- All credit goes to skpopomps and defconoi, the great members of the XDA Developers Forum.
NB: Before you continue with the below procedure, please endeavour to backup your datas in other to avoid lost of vital datas.
Read also- How to Install Flashplayer on Android 4.4 Kitkat
- How to Install Nokia X Launcher on Any Android
Procedures For Installation:
1. First off- Make sure you've successfully unlocked the bootloader of your nexus 4 and then install custom recovery.
2. Then Download Android L ported version for the Nexus 4 Smartphone and make sure the you save the downloaded zip file to your PC.
3. The connect your Nexus 4 Smartphone from your device to your PC with the help of a USB Cable, the move the downloaded zip file from your PC to the SD Card root of your smartphone.
4. Once you've proceeded the above step, then simply switch off your device and boot to recover mood, either the CWM recover or TWRP recovery.
5. From the recovery menu, simply select the ''wipe data/factory reset'' option, then ''mounts and storage'' >> ''Format system''
6. After that, select the option, ''Advanced'' >> ''wipe dalvik cache''
7. Then press, ''install zip'' and install the zip from SD Card, then select the zip file that you've move to your SD Card and confirm the flasing procedure.
8. Once you've successfully completed the flashing procedures, the press ''wipe cache'', and move to advanced option to select "wipe dalvik cache".
9. Finally, move back to the recovery menu and tap "reboot into system."
Kudos. You're done with the installation. The booting process might take upto 10 minutes, so be patient at that stage.
If you encounter any difficulty in following any of the above steps, please to let us know, specifying the problem, and we won't hestitate to resolve such problem.
For more tips and tricks with interesting guides regarding to any android related tutorials, check in our Android section.
CareerGiGo is an online publication created for Immigrants in search of better life abroad. It's also an >> Information hub for Immigrants, study abroad, visa guide and job offers. They focus more on helping Asians and Africans who wish to travel abroad, study and also work there.
Best Way to install Android L on Nexus 4 Smartphone
4/
5
Oleh
Anyikwa chinonso
6 blogger
Is this rooting of Nexus 4?
Replynope.. it's installation of android l os on nexus 4
Replyplease can we get flashable android L to work on HTC vivid?
Replywould inform you guys once it's avaliable
ReplyHi Codedtinz Chiboy,
ReplyI am here first time through Emmanuel's blog.
this is really easy method to install Android L on Nexus 4 Smartphone.
Nexus 4 is very really smartphone.
any way thanks for sharing such great information with us.
Rana Irfan
wow, it's good to know that the tips really helped you, tnx for visiting anyway..
Reply