
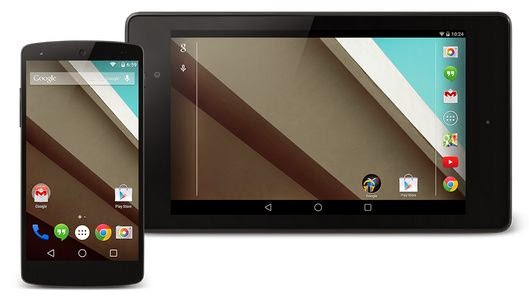
Lately, Google introduced the inventor preview of the latest Android OS which is Android L. For the meantime, the preview is only compatible for Nexus 5 and Nexus 7 users. That is, they can easily upgrade to the Android L Operating System.
Today's stroll, I would brief you on the best ways to root Nexus 5 and Nexus 7 on Android L Preview, and all credits goes to the senoir XDA Developer Chainfire who unvieled the New script for rooting Nexus 5 and Nexus 7 on Android L preview.
Procedures:
1. First Download the Nexus drivers and then install on your PC
2. Then Unlock the bootloader of your nexus device, be it Nexus 5 or Nexus 7. You can check for the Nexus bootloader Unlock Guide here.
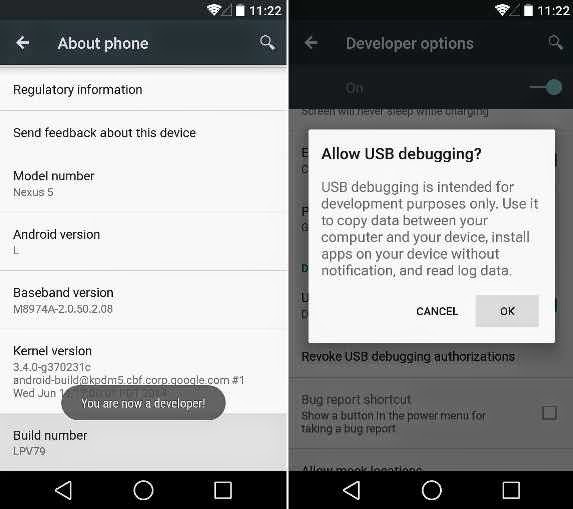
3. Once the above process is proceeded, then enable USB Debugging. To enable, simply Go to settings >> About Phone, then scroll down and then click on Build Number 7 times, then you would recieve an alert on the screen, which is, ''You are Now a Developer'', then you are to move to the developer option and tick out the box which is next to USB Debugging, then tap Ok.
Read also: - How to install Kitkat Google Launcher
- How to Root Tecno R7 Smartphone without the use of PC
4. Then Download ADB files on your PC. They have that for Window Users, Mac users and also that for Linux users. Then extract the file to your desktop screen.
5. After the above steps, you're to download recovery for your nexus device, either the TWRP or the Clockworkrom recovery, then select your nexus device type and download the recovery tools on your computer. Don't forget to rename the recovery file you downloaded to recovery.img
6. That ABD folder that you downloaded, as mentioned in step 4, move the renamed recovery.img to the folder.
7. Then switch off your nexus device and then boot in fastboot mode. When booting in fastboot mode on Nexus 7, simply press on volume down + power button, then for Nexus 5, you've to press the volume up + volume down + power button simutaneously, then you would automatically be directed to bootloader mode.
8. Then connect your Nexus device to your computer through the use of USB cable
Read also: -How to Easily Flash the Custom Rom of your Android Device
- How to Root Any Android Device without the Use of a computer
9. Then open the ADB folder that you moved on your desktop, then hold shift key and then make a right click on your keyboard, then click and choose ''open command window here''.
10. Then a command prompt window would appear. Simply input the below command:
fastboot flash recovery recovery.img
11. With the above step, it would help restore the recovery of your nexus device. Then make use of the volume button to select ''restart bootloader'' option, followed by pressing Power button.
Immediately you're done with that, the recovery would be successfully installed on your device. Now your device is ready for rooting.
12. Then Download Super SU v2.00 which is patched for Android L, and also download the boot file which helps to fix the binary issue. Download boot file for Nexus 5 or that for Nexus 7.
13. Then Copy and paste the downloaded boot file and SuperSU to a safe location of your device.
14. After the above steps are proceeded, then switch off your nexus device, then boot to recovery mode. To boot to recovery mode, simply hold the volume down along with the power button till your device starts and written with arrow around it. Then you're to press the Volume down twice, until the recovery option is being displayed. Once it shows the recovery option, then press the volume up to enter the recovery mode.
Recommended: How to Install CyanogenRom on Non-Rooted Android device
15. Once you've gotten to the recovery mode, select install zip and from your SD card, browse the safe location where you saved those files. Then you're to first select SuperSU file, and then flash SuperSu file. Then also apply same procedure to locate Boot file and also flash it.
16. Then Go back to the Main menu of the recover to reboot your nexus device, by simply selecting reboot now system.
Once that is done, your device would take few minutes to boot, then wait till it boots to the homescreen.
Kudos! Your Nexus 5 or Nexus 7 Device is Now rooted on Android L preview.
Hope you found this guide so useful. Please don't forget to share this article on social media with the help of the share buttons below. You can also help us bookmark this article, and if you encounter any difficulty with any of the above procedure, please do specify and we won't hesitate to clearify it. We also got loads of Android tips here.
Our Fans,
Also Like our Facebook Page and Join our Free Email Subscribers for Regular Email Updates of our Articles.
Today's stroll, I would brief you on the best ways to root Nexus 5 and Nexus 7 on Android L Preview, and all credits goes to the senoir XDA Developer Chainfire who unvieled the New script for rooting Nexus 5 and Nexus 7 on Android L preview.
Procedures:
1. First Download the Nexus drivers and then install on your PC
2. Then Unlock the bootloader of your nexus device, be it Nexus 5 or Nexus 7. You can check for the Nexus bootloader Unlock Guide here.
3. Once the above process is proceeded, then enable USB Debugging. To enable, simply Go to settings >> About Phone, then scroll down and then click on Build Number 7 times, then you would recieve an alert on the screen, which is, ''You are Now a Developer'', then you are to move to the developer option and tick out the box which is next to USB Debugging, then tap Ok.
Read also: - How to install Kitkat Google Launcher
- How to Root Tecno R7 Smartphone without the use of PC
4. Then Download ADB files on your PC. They have that for Window Users, Mac users and also that for Linux users. Then extract the file to your desktop screen.
5. After the above steps, you're to download recovery for your nexus device, either the TWRP or the Clockworkrom recovery, then select your nexus device type and download the recovery tools on your computer. Don't forget to rename the recovery file you downloaded to recovery.img
6. That ABD folder that you downloaded, as mentioned in step 4, move the renamed recovery.img to the folder.
7. Then switch off your nexus device and then boot in fastboot mode. When booting in fastboot mode on Nexus 7, simply press on volume down + power button, then for Nexus 5, you've to press the volume up + volume down + power button simutaneously, then you would automatically be directed to bootloader mode.
8. Then connect your Nexus device to your computer through the use of USB cable
Read also: -How to Easily Flash the Custom Rom of your Android Device
- How to Root Any Android Device without the Use of a computer
9. Then open the ADB folder that you moved on your desktop, then hold shift key and then make a right click on your keyboard, then click and choose ''open command window here''.
10. Then a command prompt window would appear. Simply input the below command:
fastboot flash recovery recovery.img
11. With the above step, it would help restore the recovery of your nexus device. Then make use of the volume button to select ''restart bootloader'' option, followed by pressing Power button.
Immediately you're done with that, the recovery would be successfully installed on your device. Now your device is ready for rooting.
12. Then Download Super SU v2.00 which is patched for Android L, and also download the boot file which helps to fix the binary issue. Download boot file for Nexus 5 or that for Nexus 7.
13. Then Copy and paste the downloaded boot file and SuperSU to a safe location of your device.
14. After the above steps are proceeded, then switch off your nexus device, then boot to recovery mode. To boot to recovery mode, simply hold the volume down along with the power button till your device starts and written with arrow around it. Then you're to press the Volume down twice, until the recovery option is being displayed. Once it shows the recovery option, then press the volume up to enter the recovery mode.
Recommended: How to Install CyanogenRom on Non-Rooted Android device
15. Once you've gotten to the recovery mode, select install zip and from your SD card, browse the safe location where you saved those files. Then you're to first select SuperSU file, and then flash SuperSu file. Then also apply same procedure to locate Boot file and also flash it.
16. Then Go back to the Main menu of the recover to reboot your nexus device, by simply selecting reboot now system.
Once that is done, your device would take few minutes to boot, then wait till it boots to the homescreen.
Kudos! Your Nexus 5 or Nexus 7 Device is Now rooted on Android L preview.
Hope you found this guide so useful. Please don't forget to share this article on social media with the help of the share buttons below. You can also help us bookmark this article, and if you encounter any difficulty with any of the above procedure, please do specify and we won't hesitate to clearify it. We also got loads of Android tips here.
Our Fans,
Also Like our Facebook Page and Join our Free Email Subscribers for Regular Email Updates of our Articles.
CareerGiGo is an online publication created for Immigrants in search of better life abroad. It's also an >> Information hub for Immigrants, study abroad, visa guide and job offers. They focus more on helping Asians and Africans who wish to travel abroad, study and also work there.
Best Way to Root Nexus 5 and Nexus 7 on Android L Preview
4/
5
Oleh
Anyikwa chinonso
4 blogger
Nice Post Budy .
ReplyI wil root my Nexus 7 .
Will try it :)
Yh.. Gv it a try :)
ReplyPls i need your help on how to root a HTC sensation z710 e.. Pls I need d full instruction
Replycheck our rooting resolution center
Reply... http://www.guruswizard.com/2014/03/do-you-wish-to-root-android-smartphone.html